
Despite it being one of the most important features a car can offer for comfort, the AC is often overlooked by owners. Thus, when it stops functioning completely, you are left sweating on a summer noon. Whenever you feel the AC compressor sucking in hot air, it is likely suffering from a damaged component. Sitting in your car feeling exceptionally warm because the AC isn’t working? Here’s how to test a car AC compressor to uncover the reason behind this.
If the AC compressor doesn’t work, it may also cause an engine failure. The last thing you want is your car to stop working because the AC compressor isn’t functioning. We don’t have to talk twice about the dangers of a vehicle that suddenly stops moving. Moreover, a damaged AC compressor generally causes issues to the steering as the power is limited, making the brakes more prone to malfunction.
Therefore, you can see that the AC compressor plays an important role in pushing out fresh air and subsequently making sure it circulates through the whole AC unit. Fortunately, you can also fix a faulty AC compressor. All you have to do is perform a series of tests on it with a multimeter to confirm the problem. We will discuss how to test the car AC compressor and everything related today.
After recognizing the issue, schedule an appointment with a professional mechanic and have it fixed.
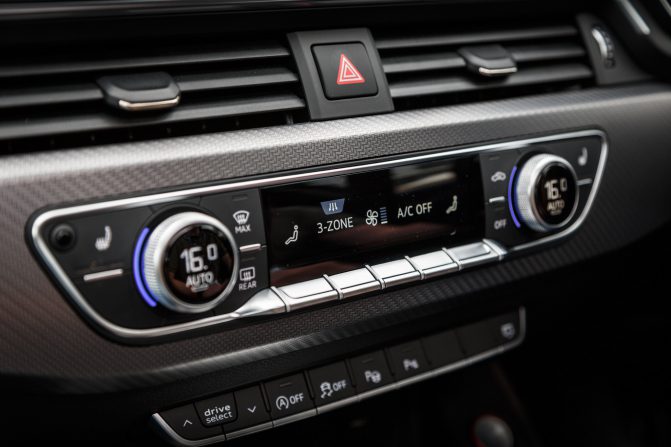
Auto Air Conditioning: Working Principle
You may view the AC compressor as the core of the air conditioning unit of your vehicle. In summary, the air conditioning compressor will work for your car the same way your heart works for your body. It circulates crucial fluid, the refrigerant, around the AC system.
In addition, the compressor compresses the refrigerant into a fluid state from a gaseous state, transmitting it to the condense that works like a “heat-exchanger.” It essentially removes the heat from the liquid. From there, it travels to the orifice tube, an expansion valve where it takes its gaseous state.
Moisture is removed from the refrigerant through an accumulator, and it is then moved to the evaporator in your vehicle’s cabin, generally below the dash. The cold refrigerant then cools the air that moves through the evaporator. The drier, cooler air is set outside the vent with a fan into your vehicle’s interior.
Signs That Your AC Compressor Is Faulty
When your AC does fall, the experience can be rather painful. Let’s be honest: we are too used to mechanically chilled air at our disposal at any time. The notion of losing that, beginning to sweat, and finally having to crack the windows is powerful enough to make you lose your mind for a split second. Due to that, you should always keep an eye peeled for telltale signs of a faulty AC compressor.
Here’s the thing. You will almost always get clues that the air conditioning will fail. Although sometimes the system can crash out of the blue, it is a gradual process. The signs come along with the decay. The given hints will help you detect a problem in the system:
How To Test Car AC Compressor: Air Is Not Cold But Cool
This is probably the easiest to notice. The air’s relative coldness that is moving through the interior of your car will give you the first indication of a problem. If the air conditioning is switched on, the fan is set on a high setting, the temperature is turned down, but the air coming out of the vents is not as cold as it used to be, don’t disregard the symptoms.
Consider it an early sign that something is going to go wrong with the AC system. The two most probable problems are a faulty AC compressor and a leak in the system letting out all the refrigerants.
How To Test Car AC Compressor: Noises From Below The Hood
A vehicle making weird noises is never a good sign, and that applies in the case of a faulty AC system as well. As mentioned before, the air conditioning compressor has difficulty compressing and regulating the AC refrigerant. It usually cycles on and off multiple times throughout your daily driving course, and it is littered with components that are capable of malfunctioning.
The AC compressor can often have a sealed bearing that can seize up or wear out, particularly if the bearing lubricant starts leaking out. That can generate a high-pitched grinding or squealing noise of metal-on-metal. When the bearing freezes up, it will cause the drive belt to seize up, and it will not be able to turn the compressor anymore.
In some cases, the compressors can be changed. However, we suggest replacing the bad compressor with a brand new one. Not only is it the most efficient solution, but it will also give a better, sturdier repair.
How To Test Car AC Compressor
Diagnosing the air conditioning compressor is a relatively easy task; you have to follow a few basic steps to understand whether there is a need for replacement/repair or not.
How To Test Car AC Compressor – Step 1: Check The AC Compressor For Damages
Before examining the AC compressor, make sure you turn off the energy circuit to the conditioning unit. This vital step will protect you from getting electrocuted when conducting this test. Switch off the AC compressor’s power circuit along with any other switch you see around it.
Afterward, unscrew the faceplates and remove them from the AC unit, and this will allow you access to the internal elements, particularly the ventilation holes, among other internal pieces. Remove the power access panel and inspect how the wires have been linked to the air conditioning unit once you are done. Moreover, you should look around for burnt terminals within the system.
How To Test Car AC Compressor – Step 2: Inspect For Ground And Energy At The AC Compressor’s Clutch
Disconnect the power connectors from the AC clutch compressor and set the multimeter on DC (direct current). Connect the positive probe leads to one of the terminals and connect the negative probe to the battery ground. Before starting the engine, set the AC.
Check the voltage shown on the multimeter; if it is zero, you have to move the positive probe lead to a different terminal in the power connector. The reading value should not be zero anymore but if it is, move the negative probe lead to another terminal.
Both the probe leads are positioned on the power connectors, which confirms that both the compressors’ clutch and the ground are getting enough power supply. Thus, it is the clutch coil that is damaged and needs replacement. Generally, a few clutches can be repaired while others can be replaced.
How To Test Car AC Compressor – Step 3: Examine The Power Supply On The AC Compressors’ Clutch
Attach the negative multimeter probe lead on the negative terminal of your vehicle’s battery to understand whether there is any power flow on terminals 2 and 3. If no voltage reading is being displayed on the multimeter, examine the fuses and wiring to the relay.
If there is power, connect the negative probe lead on terminal 3 and the positive probe lead on terminal 4 and check the multimeter’s battery voltage display. In case there is no reading, the PCM may have a problem and not produce ground to the control relay coil.
How To Test Car AC Compressor – Step 4: Check No Ground On The Relay Coil
Your PCM may not be generating ground the compressor relay coil if:
- The refrigerant is low, or,
- The system’s pressure is at its maximum level due to the condenser being blocked or the orifice and TMX valve being faulty.
Your job is to find both of them. Which means, the minimum and maximum pressure switch. After that, join the positive probe and the negative probe leads to the correct terminals.
After that, start your vehicle’s engine and turn on the air conditioning to its maximum setting, and you inspect the multimeter’s displayed voltage. If there is a voltage on one of the terminals, the PCM is producing energy. Proceed to perform the same test on switch five. If there is power on every switch, you must perform a continuity test on all the switches.
How To Test Car AC Compressor – Step 5: Check For Continuity At All The Pressure Switches
Set the multimeter to ohms before placing a 1-meter lead on terminal five located on the low-pressure switch. Connect the other to terminal seven on the switch. The refrigerant is okay if the switch is shut, and you see the right readings. But if the pressure is dangerously low, the switch will open, and you might get incorrect reading values between the two terminals.
Conduct the same process on the maximum pressure switch, keeping the multimeter on an ohm setting. Only this time have a multimeter probe lead connecting to terminal eight and terminal six.
If the switch is shut off, understand that the refrigerant’s pressure is perfect, as the multimeter’s reading value will be shown. On the other hand, if the pressure is too high, the switch will open, and the reading will be infinite around five and seven. Take this as a sign that there is a major problem with your car’s AC compressor that has to be repaired as soon as possible.
How To Replace The Car AC Compressor
You already know how to test a car AC compressor, so now you may be interested in how to replace a faulty unit. You can save a few bucks by DIY-ing this repair, so why not? Only try to replace the AC compressor yourself if you have some experience handling car components and are confident. But before that, put on your latex gloves and a pair of safety glasses!
Required Equipment
- Refrigerant
- Wrench set (line wrenches too)
- Socket set
- Recovery machine for refrigerant
- Serpentine belt tensioner tool
- Thermometer, gauges, and hoses
- Vacuum pump
- Receiver drier
- AC compressor
Easy Steps to Replacing Car AC Compressor
1. Preparation Steps:
- Find the AC compressor and take out the serpentine belt from the compressor’s pulley. This step may require the use of a serpentine belt tool. You have to use the tensioner and reduce pressure on the belt to slide it off. Check out this video to learn how to replace a serpentine belt.
- Using a recovery machine, empty the system’s refrigerant. Recovery machines are a kind of specialized equipment mostly found in AC shops – you might have to bring your car to a mechanic’s for this step.
- Take out the negative battery cable.
2. Disassembling Parts:
- At the compressor, there is a bolt securing the refrigerant lines. Remove it and check the lines carefully for signs of wear and/or dirt.
- Detach the electrical connections of the compressor.
- Disconnect the mounting bolts of the compressor and pull the unit from your car.
3. Fit In The New Compressor:
- Place the new compressor in the opposite order. According to the warranty, you may or may not have to change the receiver/dryer and orifice tube.
- Install and fasten the compressor mounting bolts. Attach the electrical connectors.
- Change the O-rings of the refrigerant tube and grease them with the proper oil.
- Reinstate the refrigerant lines and place the belt on the pulley again.
- Run a vacuum through the system to get rid of any residual moisture or atmospheric air. For that, you need manifold gauges and a vacuum pump. There will be hoses connecting the high side and low side of the system – these connectors are of different sizes, so you cannot mix them up. The yellow hoses of the gauges will then link to the vacuum pump itself. Confirm all connections are airtight.
- While the pump is operating, open the valve at the low gauge side – you will hear a change in the motor’s tone as the vacuum is pulled up. Let it run for half an hour and shut the valve; the mercury reading should be between 28” to 29”. Anything under that can sign a serious system leak.
- You should charge the system after the vacuum is achieved. To do that, reattach the battery and join the refrigerant can or keg with the yellow hose. Turn the keg over so the refrigerant starts flowing through the valve. Start and ignite the engine while observing the gauges (do not open the high-side valve at all). Place a thermometer into the interior AC vent when the system runs on max setting. Your AC is fully charged when the system starts cooling at 30°-36°.
What Is An AC Compressor Clutch?
Now that we are done talking about how to test car AC compressors, we have to briefly discuss the air conditioning clutch. Why? The clutch and compressor are 2 of the essential bits of a car’s air conditioning system. Along with other car components, these parts have to be maintained regularly to ensure they are working correctly.
An AC compressor clutch derives power from the engine’s flywheel. It is controlled with a clutch system where the shaft is disengaged/engaged to a rotating shaft with an electromagnetic switch.
Working Principle Of An AC Compressor Clutch
The clutch compressor turns on so you can use your vehicle’s air conditioning whenever you wish to. The engine is directly connected to the compressor’s pump rotor with a belt to keep the clutch compressor functioning smoothly. An electromagnetic clutch element is common in car AC systems, and it is tasked with engaging the compressor to turn the AC unit.
The compressor clutch comprises a friction plate placed next to the electromagnetic coil. The compressor clutch generates a strong current that moves through it when engaged. This creates a powerful electromagnetic force that draws the coil in the friction plate’s direction, engaging the pump rotor. Consequently, the compressor is run.
Compressor Clutch Issues
Thanks to the clutch, the compressor can cycle on and off instead of being in use constantly. This decreases overall wear on the compressor and improves fuel economy as the engine doesn’t have to spin the compressor when cool air isn’t needed.
However, one problem that you can face is the failure of the clutch compressor. It can get stuck in the “on” position, resulting in the compressor spinning all the time the vehicle is moving. Or, it can stop functioning totally, which will prevent the compressor from engaging. Neither is healthy. The clutch can be changed in some cases, but we do think that the best decision is to replace the clutch and compressor as a unit.
What Can Stop The Clutch From Engaging?
These are some of the plausible reasons the compressor clutch isn’t engaging with the compressor:
- Excess refrigerant
- Insufficient oil in the compressor
- Inadequate refrigerant
Default Lockout On The Clutch Sensor
Most modern-day vehicles feature AC compressor clutches that are switched on and off via the low pressure and high-pressure switches, as well as the level of compressor oil. These 3 aspects can disable the clutch and stop it from engaging if the sensor finds insufficient oil, inadequate, or too much refrigerant.
Burnt Fuse
Turn off the car engine and detach the fuse from the system to know if the fuse is burnt. Use a multimeter to check the fuse. Alternatively, any instrument that can gauge the situation can help. If the fuse is fine, return it to its initial place.
What Should I Do If The AC Compressor Clutch Is Not Engaging?

Below are some of the possible steps you can take to address an AC compressor clutch that will not engage:
1. Check Oil Level In The Compressor
You can easily see the compressor oil level from its display glass. A red line on the glass shows the level of oil needed. If the oil level drops below the red line, the oil must be added. Make sure to add oil that works with your particular compressor. Only use those approved by your AC system’s manufacturer – information you should be able to find in the user’s manual.
2. Discharge Overcharged Refrigerant
A compressor that is overcharged with refrigerant will give unnaturally high-pressure results. Check your vehicle’s AC system manual to decide the high-pressure side’s correct operating pressure.
If you are sure that the compressor has been overcharged, use a discharge valve to drain the refrigerant. You can find it near the gauge. Bleed it until the desired level of pressure is achieved.
3. Insufficient Refrigerant In Compressor
Check if the pressure gauge of the high-pressure side recognizes too low a pressure. This will tell you if there is too little coolant in the compressor. You can inspect your vehicle’s AC manual for the correct pressure level.
Repair kits made for charging refrigerants are available in the market, and they come with instructions on how to do it.
Fixing Your AC By Changing The Compressor
The only way to “repair” a failed compressor in an air conditioner is to replace the component. This is also the best option in our perspective – it’s far cheaper than purchasing a full new air conditioner. In some cases, this works the best.
Consider your system’s manufacturer warranty? Still good? A system under the age of 10 that has been professionally maintained every year has a good chance of being covered under warranty. So, go ahead and replace the compressor. In this case, you will not be financially responsible for the component. While you have to pay for labor, there are no additional charges for buying a new compressor.
That being said, a compressor may also fail because the air conditioning unit is old (and the warranty ceases to be helpful). A properly maintained system can provide service for 10 to 15 years, but once your system has reached the age and somehow failed, it might be good to upgrade it instead of replacing it.
Installing a new compressor in an old AC unit means even though this one component is new, other parts of the system will start breaking down and warranty replacements soon.
Bottom Line
By now, you should be clear on how to test a car AC compressor using a multimeter. Typically, this is the one essential tool you cannot do without. After performing the test, you will be able to determine whether the AC compressor needs to be repaired or replaced.