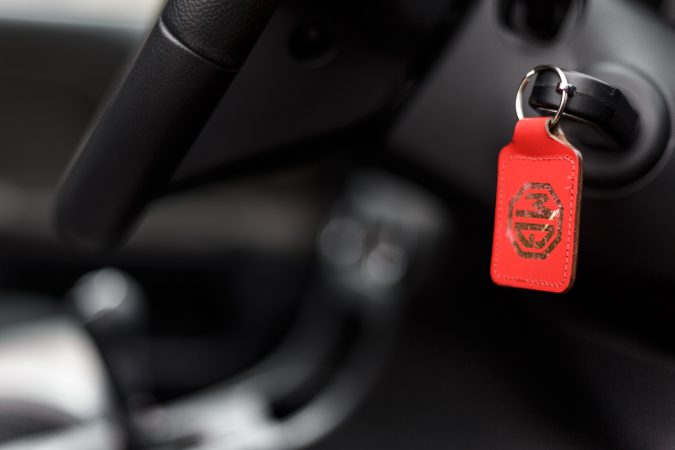
The automotive ignition, which creates sparks to burst your engine to life, is quite a surprisingly intricate set of complications. From the moment you slot your keys in, to inducing thousands of volts to ignite the fuel, there are a myriad of components and moving pieces in between. Hence, why you can sometimes be left scratching your head, wondering about what wires go to ignition switch.
That very switch is what allows you to start, drive, or turn off your vehicle with the twist of your keys. While it has a seemingly simple task – varying either turning on, off or somewhere in the middle – an ignition switch can fail. It’s one of those parts of a car that can unexpectedly wear out and wither as a result of age, excessive usage, or a bit of both. Replacing the ignition switch isn’t uncommon.
Nevertheless, the trickiest part of the process during an ignition switch replacement is wiring it all in. I’m sure many of you have watched cars being hotwired in movies before. You could easily spot then that there are umpteen wires and cables that run underneath your car. As such, knowing what wires go to ignition switch is crucial in ensuring that your car’s ignition can function properly and reliably.
What Does The Ignition Switch And Its Wires Do, Anyway?
First and foremost, we have to learn more about what this ignition switch does, and its function. It’ll prove handy in trying to understand what wires go to ignition switch. So, what does it do? To put this simply, the ignition switch is essentially your car’s trigger. By activating this switch with your keys, it can power on your vehicle’s electrical and electronic accessories. Or, let the engine burst into life.
It can otherwise be referred to as the “starter switch” or “start switch”, whereby its purpose is as the name suggests. Your car’s ignition switch can be actuated in one of two ways. In the old days, you’ll need to slot in and twist a metal key. With most cars on the market today, however, controlling the ignition switch requires pushing a starter button. In either case, they both activate the car’s ignition.
As far as moving the car around goes, the ignition switch is a junction between the car’s starter and battery. The same goes with your in-car gadgets, such as air conditioning, power windows, radio, or so on, as the middleman between them and the battery. By turning on the ignition, you’re allowing current from the battery to pass through to the engine and electrical accessories, respectively.
But why not create a direct connection with the battery, you might ask? In short, it all has to do with how much charge your car’s battery has. If there wasn’t an ignition switch in every car, keeping your interior clock ticking would be sufficient to drain the whole battery if the engine wasn’t running. And on top of that, there’d be no way for you to control when you’d want the engine or electrics to start.
What Are The Parts Of An Ignition Switch, Besides The Wires?
Note, mind you, that the ignition system on your end contains two distinct components. More often than not, most folks interchangeably use them, even though they both have differing operations. It’s vital that you’re able to discern one from the other if you’re keen to heighten your chances to fix the ignition thoroughly. Buying and fitting in the wrong component is never an ideal scenario.
- Lock Cylinder – It protrudes out of the steering column or dashboard, where you’d stick and twist the key in. They’re fast becoming extinct in many cars today, as keyless ignition systems mean that you don’t need a physical key. Rather, a wireless signal between the key fob and your immobilizer should be adequate to authenticate that you are the owner. Then, you can press a button to boot it up.
- Switch – The subject of our guide, this electronically-controlled ignition switch sits within the steering column or dash. This is where electronic signals are sent to the car’s computer, letting you control its entire ignition system by twisting the key. Note that in some cars, the switch and the lock cylinder (or “barrel”, as it’s often called) are conjoined into a single unit. In other cars, they’ve split apart.
In summary, the ignition switch’s existence in your car is there simply to turn it on or off. It creates a connection between key components, be it the starter motor to turn on the engine or your electronic in-car gadgets, to the battery. As you flick on this ignition switch, it practically gives the go-ahead for current to pass through to the respective modules, enabling them to be powered and operational.
What Are The Positions Of The Ignition Switch That You Can Turn To?
If you take a peek at the exposed section of your ignition lock cylinder, where the key goes in, you’d surely be able to spot some lettering. These denote the varying states where you’d be able to turn on the ignition switch. For example, you might only want the air conditioning turned on, but still keep your engine off. Well, this is how you control it, as the key locks into place in each of these states.
Typically, there are 4 positions that you’d twist the key in the lock to. In order, these are noted as:
First Position – Simply There To Let The Key Slot Into Place
- Position 0 (“LOCK” or “OFF“) – It exists only for you to slot the keys in safely. In other words, it does not affect your car’s ignition system or electronics. That is until you twist the key clockwise into some other position. Once you’re finished driving, you could twist the key back to the LOCK or OFF state to remove the key again. If not, the key will stay seated and locked in place (it’s a safety feature).
Second Position – Letting Your Interior Accessories Power On
- Position I (“ACCESSORY” or “ACC“) – In this mode, you’re connecting the battery with a car’s electrical accessories. The engine stays off, but you can at least enjoy your car’s creature comforts. It might be the multimedia system, radio, power windows, heated seats, lights, and more than require electricity to start working. Just be mindful that leaving it in this position for too long may drain the battery.
Third position – Preparing Your Car’s Systems To Start Up
- Position II (“ON” or “IGNITION“) – It’s self-explanatory, as this position switches on all of your electric systems. These not only include your interior accessories but also prepares the engine to be ignited. It may also involve turning on the fuel pump to circulate gasoline or diesel into the engine. This is the default state for the switch. Furthermore, it prevents the key from being removed in this position.
Fourth Position – Cranking The Engine Turn Over
- Position III (“START“) – When you’re ready to be on your merry way, you’d twist and hold the key in the START position to give the engine time to crank. This is where your car’s starter comes into play, inducing a huge amount of voltage to combust the fuel-air mixture in the engine. Once the engine’s fully running, the switch would bump the key back into the ON position, thus turning off the starter.
Symptoms For Needing To Know What Wires Go To Ignition Switch
That pretty much covers our bases as to what the ignition switch does. But why do you even need to worry about what wires go to ignition switch? To put it lightly, there are times when the switch will fail to operate properly. Thus, necessitating repairs or replacements where needed. Knowing how or where to wire in your ignition switch could be a fantastic way to conduct these fixes DIY-style.
An ignition switch is among the simpler things that you can practically do in your garage. No trips to the local dealership or workshop are entirely necessary. But how can you tell when the ignition switch is on its last legs? Well, here are a few symptoms to keep an eye out for:
- Your car would completely fail to start, although this can be confused for a myriad of other issues in addition to a faulty ignition switch.
- The car will ultimately crank, but there’s noticeably jerkiness while driving. Or, it would fail then and there in the middle of a drive and stall out your car.
- Interior accessories would behave erratically, or the dashboard lights would start flickering. Usually, this is a sign that there’s a poor connection with the ignition switch.
- The ignition key won’t turn or would refuse to budge, and prevent you from putting it into START. Or, it might get stuck in place, and you can’t ever dislodge it from the lock cylinder.
- Your ignition system would have no trouble turning on at first. However, you’ll soon find that even as you’ve already removed the key, the ignition would not be able to turn itself off.
- Although you’ve determined that there’s more than enough charge in the battery. With that said, it fails to crank the starter or the rest of the ignition.
How And What Can You Wire Into Your Ignition Switch?
If you’ve noticed any of the symptoms up above, it may be prudent of you to have your car checked out. While some of the issues you may face might be confused with other faulty components, we can point fingers at the ignition switch. You could have your car sent over to a local mechanic to proceed with an in-depth diagnosis. Or, you can refer to our guide on how to test an ignition switch by yourself.
Thankfully, the ignition switch is one of those parts of a car that most can easily work on at home. It won’t require an extensive toolset for you to disassemble it and put it back together. Nor, would this ask for an engineering degree to wrap your head around it. Nonetheless, we would first recommend that you look closely to make sure you order the right ignition switch for your particular car.
The part number of your car’s original and faulty ignition switch should be made available within the car’s repair manual. Alternatively, you should consider consulting directly with the manufacturer. Or, perhaps poke around the forums and chatrooms to ask what other owners know. Once that’s all said and done, you can proceed with replacing and wiring in the ignition switch, with these simple steps.
Note, that our focus here would be for key-based ignitions, not keyless button-push starters. Here’s what you need to know:
Step 1: Understanding What Wires Go To Ignition Switch
First and foremost, you’ll have to study more on what wires go to ignition switch. In particular, try to be precise about what make and model of vehicle you’re researching. Alas, ignition switches aren’t a universal fitment, and some cars might have a more unique layout compared to others.
You should focus on the location and functions of each pin behind the ignition switch, where it wires into the rest of the ignition and your battery. While some cars, as we mentioned, may have different labeling, we can generally see 4 pins. These respective terminals are often labeled as:
- BATT – Battery; connects the ignition switch directly to the car’s 12V battery.
- ST – Starter; connects to the engine’s starter solenoid and is spring-loaded upon contact.
- IGN – Ignition; the primary and default terminal for vehicle ignition, accessories, and other electrics.
- ACC – Accessory; connects to and powers on your car’s accessories such as radio, lights, etc.
For the most part, you can refer to a simple 4-wire ignition switch diagram to know what wire goes where. In older cars, you may also have to connect a choke, as well as individual wires for a magneto in addition to what we’ve listed here. Consult a repair or service manual to find out more.
Step 2: Disconnecting The Car’s Battery
When you’ve gotten acquainted with what wires go to ignition switch, you can begin undertaking a replacement. But before we do that, it’s always a good idea to disconnect the battery. To be precise, the negative terminal, as a safety measure and to avoid the ignition turning on while you do this.
If you don’t already know, there are two terminals on the battery – positive (+) and negative (-). You can now grab a wrench to loosen the bolts that hold together the terminals onto the battery. Then, carefully disconnect both the positive and negative ends of the battery.
It’s commonly suggested that you should detach the negative terminal first. Once that’s complete, be sure to secure and place the negative terminal to prevent it from coming into contact with the car, or the terminals. Keep it this way until you’ve finished wiring together the ignition switch.
Step 3: Freeing Away Any Trim Pieces Around The Lock Cylinder
Here comes the finicky part about ignition switch replacements, which revolves around the disassembly of your interior trim. You may refer to our guide on ignition switch replacements for a more in-depth look at this. In most cars, the ignition lock cylinder is mounted onto the steering column.
However, others might install it on the dashboard or center console, albeit it’s quite rare. A steering-mounted ignition switch is easier to take apart, at least. First, you’ll have to remove the plastic trim and protective panels that cover the ignition lock cylinder.
There are plastic clips surrounding it, which you could free up by pressing onto a series of release mechanisms with a screwdriver. It can sometimes be fastened with screws or bolts. It’s worth noting that not all cars are as straightforward to work on, so it’s wise to refer to a guide.
In addition, we should also add that some cars might only make the ignition switch accessible only if you detach the steering wheel. You can do so with a dedicated steering wheel puller. While you’re in this step, it’s wise to be cautious, as you could accidentally trigger the airbag or warning lights.
Step 4: Slot The Key In, And Turn It Into The ACC Position
In most cars, they might prevent you from disassembling the ignition switch unless you have the key. If so, you’ll need to slot your car keys into the barrel. Then, twist it clockwise to the ACCESSORY (or ACC) position. Doing so would prompt the ignition switch to be released as you pull on it.
Should you not have your car keys on hand, you could alternatively manage this by using a flathead screwdriver. Slot the flathead tip into the barrel securely, and then twist it as if you’re using a key. Just be careful though, as you could damage the barrel slots if you brute force the tip in.
On the bright side, you can skip that process entirely, as many cars include a safety release, rather than having to twist a flathead into the key slot. Grab that flathead screwdriver, and look around the ignition unit to find a small release pin. Insert and press down on this pin to free the ignition module.
Step 5: Free The Ignition Switch From The Steering Column
Either using your car keys or a flathead screwdriver, the release pin should now let you tug gently on the ignition switch module. Carefully pull the entire unit out, and it ought to enable you to pull on it fairly easily. If you encounter any resistance, then you might not have been pressing hard enough.
Go back to Step 4, and ensure that the release pin is firmly pressed. While you’re there, and once the ignition switch is completely removed, you may as well see what’s wrong with it. Diagnosis could be as simple as contacting the pins/terminals at the back with a test light.
Step 6: Double-Check What Wires Go To Ignition Switch
At this point, it’s a good idea to go back and remember what wires go to ignition switch from Step 1. The first wire that you’ll have to deal with is the positive power lead that connects the battery to the ignition switch. It’s usually seen as a thick red wire and is always powered on.
When you’ve found this thick red power cable, you can then attach a matching terminal end to this wire. This allows it to be firmly secured onto the back of the (new, replacement) ignition switch. You can use a terminal multi-tool for this, before then connecting this wire to the BATT pin on the switch.
Step 7: Repeat Step 6 For The Other 3 Wires That Go To Ignition Switch
With the battery (BATT) wire securely connected onto the back of the ignition switch, you’ll continue by repeating Step 6 for the other wires. In short, fit the right terminal end for each wire, and attach it onto the corresponding pins using that multi-tool. Connect these wires, and note their color:
- Accessory (ACC) – Purple/violet wire
- Starter (ST) – Yellow wire with red striping
- Ignition (IGN) – Yellow/red wire
Unfortunately, you can’t merely rely on the colors, hence why a wiring diagram for a specific make and model of car is crucial. In certain cars, these wires we just mentioned might carry a different hue or some might have striping to distinguish them. As a rule of thumb, some colors are shared, for example:
- Red – Power, ignition, or other functions that require a lot of electricity
- Brown/Yellow – Starter
- (Dark) Green – Ground
Step 8: Re-Seat The (New) Ignition Switch Module
Following the completion of wiring together all the terminals onto the new ignition switch, you could start by repeating the first few steps in reverse. First, use that flathead screwdriver to apply pressure on the release pin. That should allow you to smoothly slot in the now-wired-in ignition switch.
Line up the grooves, and keep pushing in the newly replaced or rebuilt ignition switch module until a solid ‘click’ is heard from the release pin. But don’t proceed with re-installing all your interior trim or steering wheel just yet. At least, not until we’ve had the chance to test it out.
Step 9: Testing The Newly Replaced (Or Rebuilt) Ignition Switch
When the module is correctly wired in and firmly in place, reconnect your car’s 12V battery. Just go ahead and re-attach the battery’s negative (and positive) terminals. Then, insert your key into the ignition lock cylinder, and turn on the ignition. Give it a good crank, and start up your car.
The engine should turn over quickly. If that isn’t the case for you, then you’ll have to repeat the steps mentioned earlier to make sure you’ve been correct as to what wires go to ignition switch. The same goes if the symptoms of a bad ignition switch reappear. Simply rinse and repeat until all are well.
Step 10: Re-Assemble The Rest Of Your Interior Trim
If you’re satisfied with how the new ignition switch is working out to be, you can proceed to put your interior back together. Of course, you should turn off the engine, and proceed to disconnect the car’s battery following that test. Refer to any guides where needed to see what goes into where.
Clip, screw and bolt everything into place as it was back at the start. Last but not least, re-affix the steering wheel back onto the column and pat yourself on the back. While not the easiest job to do, replacing and wiring together an ignition switch is still among the simpler DIY tasks for a car.
DIY Ignition Switch Replacement: Facts You Need to Know
- Most cars have four wires connected to the back of the ignition switch, labeled BATT, IGN, ST, and ACC.
- The BATT wire is a thick red wire that is always energized.
- The IGN terminal controls your vehicle’s ignition and other electronics and is usually connected with a yellow or red wire.
- The ST terminal connects to the starter solenoid and may have a brown or yellow wire.
- The ACC terminal sends power to the accessories in your car, such as the lights, radio, and windshield wipers (with a quick guide on how to change windshield wipers), and usually has a purple wire.
- The wire colors may vary depending on the car’s make and model, so consult your owner’s manual if you have any confusion about which wire is which.
- Symptoms of a faulty ignition switch include failure to start, car stalling or shaking while driving, flickering or non-working interior accessories, and a key that won’t turn or gets stuck.
- To replace the ignition switch, you need to park your car, figure out the terminals, disconnect the battery terminals, take off the steering wheel trims, take apart the steering wheel, and remove the ignition module cover.
- You then need to put the keys in the correct position, release the pins, examine the ignition switch, connect the wires to the correct terminals, and replace the ignition switch.
- After reconnecting your car’s battery, test your ignition switch, and if it’s working correctly, put your car back together in the same way you found it.
Bonus fact: The ignition switch directs the power from the vehicle’s 12-volt battery to the starter solenoid and the car’s accessories, and it’s an essential part of your car’s ignition and electrical systems.
Final Thoughts On What Wires Go To Ignition Switch
That then ends our look at what wires go to ignition switch. If you’d somehow prefer an alternative fix to replacing or rewiring the old ignition switch, you do have other options. If you’re in a bind, you could try hotwiring your car. This essentially bypasses the ignition switch entirely. It mainly involves making a direct connection between the battery and starter to crank the engine in a pinch.
Granted, this may not work on newer cars with sophisticated alarm or anti-theft systems. Plus, there are chances that you may be mistaken for a thief… Trying to steal your own car. Or, and if you have the skills for it, you could even consider retrofitting a push-button starter for your keyed ignition, just in case you’re a tad bored. In all, an ignition switch is something that you definitely shouldn’t ignore.

